
Ember CLI Mirage A Tutorial With Examples


Ember CLI Mirage is a client side mock server to develop and prototype applications. It uses a library called
Pretender in the background to make this possible.
At some point while learning Ember.js you probably have needed to mock some data from your server.
Older Ember.js tutorials recommended developers use the Fixture Adapter. It's an in memory data store that could be used with Ember Data. Unfortunately it's been deprecated for a while now. The new recommended tools are Sinon, Pretender and most recently Ember CLI Mirage.
In this tutorial we'll create a simple Ember app and mock the server with Ember CLI Mirage. The application will have a posts route that shows a list of posts. We'll briefly discuss the differences between a RESTAdapter and a JSONAPIAdapter and how mirage handles both.
If you'd like to follow along with this tutorial you can get the code on github here.
Setup
We'll assume that you already have Ember CLI installed. If not you can check out my Ember CLI guide to get it installed. Let's create a new project.
$ ember new ExampleMirage
Ember CLI Mirage is an Ember addon. As long as you have Ember CLI >= 0.2.3 you can use this command to install it.
$ ember install ember-cli-mirage
This will install, Faker, lodash, pretender and all the other dependencies Mirage requires. A new directory will appear in your app folder called mirage as well. This directory is where all the configuration occurs.
$ ember g resource posts
This will create all the necessary files for our new posts route, including the templates and the post model. By convention the template and route are posts while the model is singular post.
To receive data we'll need to create a REST adapter.
$ ember g adapter application
As of this writing I'm using the latest version of Ember CLI, 1.13.8. By default it will generate a RESTAdapter. As of Ember 2.0 the default Ember Data adapter is the JSONAPIAdapter. The JSONAPIAdapter follows the JSON API conventions. These conventions are different then what the RESTAdapter expects. We'll get into that later.
$ ember g route application
We'll be using this route to return back a set of data to the main application.
Model
For our post model we'll include a few fields.
// app/models/post.js
import DS from 'ember-data';

export default DS.Model.extend({
    title: DS.attr('string'),
    text: DS.attr('string'),
});
To keep it simple we'll just use title and text. For free Ember creates an id for every model. Ember defines it for us, it doesn't have to be included in models file. Keep in mind every record must have an id.
Router
In our application the title of each post will be displayed. Additionally we'll want to drill down on each post in our route. Edit the router.js file with these values.
// app/router.js
import Ember from 'ember';
import config from './config/environment';

var Router = Ember.Router.extend({
  location: config.locationType
});

Router.map(function() {
  this.route('posts', {path: '/posts/:post_id'});
});

export default Router;
The route posts contains a dynamic segment. A dynamic segment is a way for a route to change depending on user interaction. In this case we want the posts route to display each post using the URL. For example the first post might be under /posts/1. The :post_id is the same as our model's id number. This gets passed back to the route handler from the URL.
Routes
The routes have an important role to play. It returns back a model that the application can use in it's templates. We'll be using Ember Data's findRecord to retrieve an individual record from the data store.
// app/routes/posts.js
import Ember from 'ember';

export default Ember.Route.extend({
    model(param){
        return this.store.findRecord('post',param.post_id);
    }
});
The param is passed from the URL into the model. This posts model has an id that can be accessed via post_id. It uses that id to look up the record so it can be returned. By default the template with the same name, posts, will have access to this model.
We'll also need to edit our application route in the app folder.
// app/routes/application.js
import Ember from 'ember';

export default Ember.Route.extend({
    model() {
        return this.store.findAll('post');
    }
});
Here we use Ember Data's findAll. This simply returns back all the records in the post data store.
Templates
Our application and posts route need to display information. For this example we'll just list all the posts titles with a link to get the full record information.
// app/templates/application.hbs
<h2 id="title">Welcome to Ember</h2>

{{#each model as |post|}}
    {{#link-to 'posts' post.id}}{{post.title}}{{/link-to}}<br>
{{/each}}
<br>
{{outlet}}
Earlier we setup the application route to return all the data from the post store. We should be able to iterate through each post using the each helper. The first argument to the helper is the array model, and the value being yielded to the block param post.
We can use a link-to for redirection to the posts route. Since it has a dynamic segment we must also include the id of the route. We can use the post.id to accomplish this.
// app/templates/posts.js
Title:{{model.title}}<br>
Text:{{model.text}}<br>
The posts template is simple. If a post is clicked on in the application template the posts template will display the title and text information received from the model.
Ember CLI Mirage
Now we are ready to use Ember CLI Mirage to mock our server responses.
To begin let's create two new routes that will act as our server.
// app/mirage/config.js
export default function() {
    this.get('posts');
    this.get('posts/:id');
}
In this example the HTTP get request to /posts will return an in memory database of records that we'll create later. We can also create dynamic routes the same way. The posts/:id HTTP get request will respond with individual records when the id is passed in the URL. By default this will be in the Ember Data RESTAdapter format.
Fixtures and Factories
We now have a couple of choices. We can create data using fixtures, or generate them through a factory. If your testing it's probably a good idea to use factories. They can easily be added to your test cases.
Let's try out creating a fixture first. If not already there create a new folder in the mirage directory called fixtures. In the directory create a new file called posts.js
// app/mirage/fixtures/posts.js
export default [
    {id: 1, title: 'Check out the first title', text: 'Test123 title1'},
    {id: 2, title: 'Check out the second title', text: 'Test123 title2'},
    {id: 3, title: 'Check out the third title', text: 'Test123 title3'},
    {id: 4, title: 'Check out the fourth title', text: 'Test123 title4'}
];
These four posts are really simple. All of them have a title and text. Now all we need to do is load the data in a scenario.
A scenario is only used in development not in testing. It's a way we can setup our mock server.
// app/mirage/scenarios/default.js
export default function(server ) {
    server.loadFixtures();
}
The loadFixtures() method loads all the fixture data so it's available for the application.
Alternatively we can create posts using a factory.
// app/mirage/factories/posts.js
import Mirage, {faker}  from 'ember-cli-mirage';

export default Mirage.Factory.extend({
    title: faker.hacker.phrase,
    text: faker.lorem.sentence
});
Faker is a neat library. We can use it to generate addresses or texts or anything we want. In this case each title will use the faker hacker phrase, and the text will just be lorem ipsum.
Finally let's add the factory back to our scenario.
// app/mirage/scenarios/default.js
export default function(server ) {

    server.createList('posts',10);
    server.loadFixtures();
}
The sever.createList takes two arguments. The first is the factory name and the second is how many we want to create.
I'm not going to go into testing too much but you can use mirage very easily with it. Just add the server.createList the same way you do in the scenario, it will generate the data just as if you had a real server connected.
What about JSON:API?
If you remember when I generated the application adapter it created a RESTAdapter. The adapter file generated looks like this.
// app/adapters/application.js
import DS from 'ember-data';

export default DS.RESTAdapter.extend({
});
When using the REST adapter data must be in a certain format. For example our posts JSON data must be in this format.
{
  "posts": [
    {
      "id": 1,
      "title": "I'm Running to Reform the W3C's Tag",
      "text": "Some Text"
    },
    {
      "id": 2,
      "title": "Rails is omakase",
      "text": "Other text"
    }
  ]
}
Ember Data's RESTAdapter also requires that individual records are returned with a singular "post" not "posts" in the JSON response.
However with Ember 2.0 the JSONAPIAdapter is different. Our data might look like this instead.
{
  "data": {
    "type": "posts",
    "id": "1",
    "attributes": {
      "title": "I'm Running to Reform the W3C's Tag",
      "text": "Some Text"
    }
  }
}
The JSON API standard requires a data block in this format with attributes. To get this mocked in Mirage first you'll need to make sure that your using hyphenated keys so the db field names match. For example firstName becomes first-name. Last name is last-name.
//mirage/factories/user.js
import Mirage, {faker} from 'ember-cli-mirage';

export default Mirage.Factory.extend({
  'first-name'() { return faker.name.firstName(); },
  'last-name'() { return faker.name.lastName(); }
});
We don't have hyphenated keys so we don't need to worry about this. To return back the correct format we'll need to edit the route handler in the config.js file
// app/mirage/config.js

//single data
this.get('/posts/:id', function(db, request) {
  let id = request.params.id;

  return {
    data: {
      type: 'posts',
      id: id,
      attributes: db.posts.find(id)
    }
  };
});

//collection of data
this.get('/posts', function(db, request) {
  return {
    data: db.posts.map(attrs => (
      {type: 'posts', id: attrs.id, attributes: attrs }
    ))
  };
})
The scenario and fixture data remains the same.
Starting the application
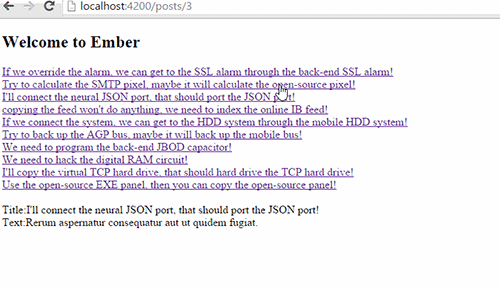
Run ember server and if all goes well you should see a screen like this.
Next Up
We could have covered more here. Testing is really easy to do with Mirage and it's something everyone should look into. You can also easily mock data with relationships.
Hope this helped! We went over creating a simple Ember application with dynamic segments, routes and a model. We used Ember Mirage CLI to create a mock server with data.
Please leave a comment if you have any questions!
Image Credit SandlotScience