
How-To Guide: The Phoenix Framework And Ember.js


Updated 1/4/2017 with Phoenix 1.2.1
In this guide I'll go over how to setup the Phoenix Framework as our back-end to an Ember.js front-end. We'll use JSON API with Phoenix and Postgres as our DB.
I've been looking around for guides on using Phoenix with Ember and I thought the best way of learning would be writing my own. As I was writing this I found out it was incredibly easy to get something working in Phoenix fairly quickly. The only problems I ran into were getting some of the dependencies setup correctly. After that hurdle I was good to go.
This guide is by no means for advanced users. This guide is a good starting off point in learning Phoenix. It's also good reference material.
If you like to follow along the Ember UI code is on Github. The Phoenix code is also on Github.
What is The Phoenix Framework?
Phoenix is a web development framework written in Elixir that uses a server-side MVC pattern. Elixir is a functional language that leverages the Erlang VM. You don't have to understand Elixir to use Phoenix. However, anything beyond a basic application will require you to learn at least the basics in Elixir. Learning Elixir is beyond the scope of this tutorial however I'll do my best to explain each concept as they come up.
By the way Phoenix has a lot of similarities to other web frameworks like Ruby on Rails or Django. So even though the syntax might be different it shouldn't be too hard to understand if your familiar with those other web frameworks.
Phoenix Layers
At a high level Phoenix is comprised of several layers. Plugs are reusable modules that Phoenix uses to help define certain behaviors. For example, the request JSON API serializer or logging.
Another important component is Ecto. Ecto is essentially the database wrapper for Elixir/Phoenix. This will handle all the interaction with the database, queries and models of our domain data. We'll take a high level look at this later.
There are many other aspects of Phoenix. Here are some of the other parts of the framework.
You can click on any of the links above to get more information. At a high level data flows this way.
- Messages arriving in are sent to the end point first. Which then dispatches the message to a specified router.
- The router parses the message and sends them to the corresponding controller or action.
- The controller is responsible for preparing the data, and passing it onto views. It can also perform redirects.
- The view is the presentation layer and renders the templates and decorates the data.
Alternatively channels can be used for real time communication with sockets. Pubsub is used with the channel layer to subscribe to messages. We won't be discussing Channels or Pubsub in this tutorial.
Let's take a look on how to get started.
Installing Elixir and Phoenix
Before we can begin we'll need to install Elixir. You can check out the install guide on the Elixir site here if you like. This guide will assume you're on Mac or Linux.
Mac OS X
$ brew update
$ brew install elixir
I prefer to use Homebrew for OS X as my package manager. Alternatively you can use Macports. Make sure you update brew before installing Elixir. I ran into a problem where brew was outdated so an older version of Elixir was installed. The older version of Elixir wasn't working correctly with Phoenix.
Linux (Ubuntu)
$ wget https://packages.erlang-solutions.com/erlang-solutions_1.0_all.deb && sudo dpkg -i erlang-solutions_1.0_all.deb
$ sudo apt-get update
$ sudo apt-get install esl-erlang
$ sudo apt-get install elixir
After Elixir is installed you'll have access to mix. Mix is a build tool that you'll use to install dependencies and create projects.
Begin using mix by installing Hex.
$ mix local.hex
Hex is a package manager for the Erlang VM. We'll need it for our project.
Now we can install the Phoenix mix archive. We'll need this so we can use mix to generate our Phoenix application.
$ mix archive.install https://github.com/phoenixframework/archives/raw/master/phoenix_new.ez
Keep in mind that Phoenix has the option of using something called brunch to compile static assets. You'll need to have npm installed for this to work. As always I recommend that you use NVM to install your node versions.
Lastly we need to get PostgreSQL installed. We can certainly using MySQL instead however it's the default with Phoenix so we'll use PostgreSQL instead.
For Mac I would use homebrew or Macports again to install it.
$ brew install postgres
That should be it on the Phoenix side! You can now get started. It might be a good idea to double check things are working. Start the server (mix phoenix.server) and go to http://localhost:4000/api/teachers
Make sure it works!
Installing Ember.js
If you already have Ember CLI installed you can skip this section.
For Ember you'll need to make sure you have Ember CLI installed. That will require node and bower. Once gain I would recommend using NVM to install node first. Then you can install bower.
$ npm install bower -g
$ npm install -g ember-cli
That should be it! If your upgrading Ember CLI I would check out the ember-cli releases github page for more info!
Creating your Phoenix App
Let's go ahead and create our Phoenix application.
$ mix phoenix.new app --no-html --no-brunch
This will generate the structure of our app and install all the dependencies. Since we aren't going to have Phoenix serve up any of our html we'll use the --no-html --no-brunch arguments. This app will be a pure API back-end.
It's a good idea now to make sure we have our database configured correctly.
$ cd app
$ mix ecto.create
This will begin the compilation and create our database. If the database can't be created you may receive a message like this.
** (Mix) The database for App.Repo couldn't be created, reason given: psql: FATAL:  password authentication failed for user "postgres"
FATAL:  password authentication failed for user "postgres"
In this case you'll need to make sure the password is set correctly in the config folder. Update the password in the dev.exs file and it should create the database. By convention the name of the database will match the name of the application with _dev attached.
You can now fire up the application and make sure it's working.
$ mix phoenix.server
(type ctrl-c to quit)
By default it will be listening on port 4000. You can open up a browser and see it running. Of course nothing is defined so you'll get an error however this will at least let you know it's running.
ja_serializer
As I mentioned at the beginning we'll be using JSON API in our Ember and Phoenix app. There is formatter that works with Elixir called JaSerializer.
Install this serializer in your application. First we'll need to add it as a dependency.
// mix.exs
...
  defp deps do
    [{:phoenix, "~> 1.1.4"},
     {:postgrex, ">= 0.0.0"},
     {:phoenix_ecto, "~> 2.0"},
     {:gettext, "~> 0.9"},
     {:ja_serializer, "~> 0.11.2"},
     {:cowboy, "~> 1.0"}]
  end
...
Next we'll need to update the config files and add the json api mime type.
Above the import_config
// config/config.exs
...
config :phoenix, :format_encoders,
  "json-api": Poison

  config :mime, :types, %{
  "application/vnd.api+json" => ["json-api"]
}

import_config ...
The documentation recommends to then run the following commands to make sure everything is compiled. (This is assuming you are using Phoenix 1.2.0 or greater! Check the documentation if you are using an older version)
$ mix deps.clean mime --build
$ mix deps.get
$ mix deps.compile
Next we'll need to update the router. This will tell Phoenix to use JSON API when accepting requests.
// web/router.ex
defmodule App.Router do
  use App.Web, :router

  pipeline :api do
    plug :accepts, ["json-api"]
  end

  scope "/api", App do
    pipe_through :api

  end
end
That should be it for the initial setup of the JSON API serializer.
Setting Up The Rest Of The Phoenix Application
Now that we have everything installed let's create a simple app that will return JSON API to the user. We want to create a /teachers route that will return one or more teacher records.
First things first let's disable the debug errors. This will eliminate the debug errors that popup when we navigate to a part of the API that isn't setup yet.
// config/dev.exs
...
debug_errors: false,
...
Let's create the teacher route and model. We can use mix and the ja serializer generator to do this quickly. It uses the same format as the phoenix json generator.
$ mix ja_serializer.gen.phoenix_api Teacher teachers name:string age:integer
The model will be called teacher and have two fields, name which is a string and age which is an integer.
You'll notice after running this command a bunch of files are created. This includes the controller, the view, model, a migration for the model and some test files. This will be everything we need for our API to work.
Phoenix Routing
Add a new resources macro into our route.
 // web/router.ex
defmodule App.Router do
  use App.Web, :router

  pipeline :api do
    plug :accepts, ["json-api"]
  end

  scope "/api", App do
    pipe_through :api
    resources "/teachers", TeacherController, except: [:new, :edit]
  end
end
This opens several new routes under api. The except option removes new and edit from our possible routes. We can take a look at the routes created by running the command below.
$ mix phoenix.routes
teacher_path  GET     /api/teachers      App.TeacherController :index
teacher_path  GET     /api/teachers/:id  App.TeacherController :show
teacher_path  POST    /api/teachers      App.TeacherController :create
teacher_path  PATCH   /api/teachers/:id  App.TeacherController :update
              PUT     /api/teachers/:id  App.TeacherController :update
teacher_path  DELETE  /api/teachers/:id  App.TeacherController :delete
The :index, :show, :create are all in the controller. By convention they are mapped to the HTTP requests you see above. Per the controller documentation here is the mapping.
- index - renders a list of all items of the given resource type
- show - renders an individual item by id
- new - renders a form for creating a new item
- create - receives params for one new item and saves it in a datastore
- edit - retrieves an individual item by id and displays it in a form for editing
- update - receives params for one edited item and saves it to a datastore
- delete - receives an id for an item to be deleted and deletes it from a datastore
Phoenix Controllers
In our app if a user navigates to /api/teachers the index action will be triggered in the controller. The generator has already created the code for us. The index action is displayed below.
// web/controllers/teacher_controller.ex
...
  def index(conn, _params) do
    teacher = Repo.all(Teacher)
    render(conn, "index.json", data: teacher)
  end
...
This is where learning Elixir and Ecto is helpful. Essentially it's looking at the database, retrieving all the records and passing it to render. The render will check the view and render the json data. Since we aren't using .html it will not use a template. If we started the phoenix server and navigated to /api/teachers we should see all the teacher data.
IEx.Pry Debugging
By the way a great tool to help debugging is the IEx.pry command. It's similar to the Ruby on Rails pry. You just have to add the require IEx and then add in the IEx.pry command wherever you want to debug. When that code is executed the program will stop and and a console will appear for you to start troubleshooting. You have to start the server with iex -S mix phoenix.server for this to work. Check out this great article from @diamondgfx for more info.
Migration File and Seeding the Database
The generator created a migration file. We can run the migration to create our teacher table.
$ mix ecto.create
$ mix ecto.migrate
You can take a peek at the model file in the /web/models folder and the migration file in the /priv/repo/migrations. We won't go into details on these files in this guide.
We want to have some data in our database so we can use the seed file to do that.
// priv/repo/seed.exs
alias App.Repo
alias App.Teacher

[
  %Teacher{
    name: "Erik",
    age: 5
  },
  %Teacher{
    name: "Bob",
    age: 7
  }
] |> Enum.each(&Repo.insert!(&1))
These are maps that define our data. The Enum.each will insert the data into the database.
mix run priv/repo/seeds.exs
Once again we use mix to run the file.
CORS
Before we are done with the API, let's add in a plugin to allow for cross origin requests. If we happen to have different host names between our UI and API we want to make sure it'll work.
First add the CORS plug to the mix file in the deps section.
// mix.exs
...
    {:cors_plug, "~> 1.1"},

...
Run this command.
$ mix deps.get
Then add it to the endpoint above the router at the bottom.
// lib/app/endpoint.ex
...
 plug CORSPlug
...
That should be it for our API!
Creating the Ember.js Ap
To keep things really simple all we want to do is connect to our API with the default JSON API adapter and retrieve the teacher data. Then we'll display it to the user.
$ ember new ember-app
$ cd ember-app
$ ember g template index
$ ember g route application
$ ember g model teacher name:string age:number
This will create the scaffolding for the Ember project, the router and the model.
Edit the application route and have it return the teacher model
// app/routes/application.js
import Ember from 'ember';

export default Ember.Route.extend({

    model(){
        return this.store.findAll('teacher');
    }
});
By convention the findAll will trigger a HTTP GET to the server at /teacher using the JSON API adapter.
Now we should have access to the model in our index template file. Let's see if we can edit the hbs file so we can display the data we retrieved.
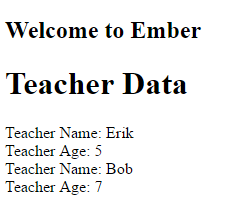
// app/templates/index.hbs
<h1> Teacher Data</h1>

{{#each model as |teacher|}}
Teacher Name: {{teacher.name}}<br>
Teacher Age: {{teacher.age}}<br>
{{/each}}
As you can see this is a really simple example. We are just using the Ember each helper to iterate through the model data and display it to the user.
Putting it all together
For now we won't go over actually deploying the application. I'll leave that for another day. Let's start the Phoenix server first and proxy over the Ember app so it can talk to our API.
$ cd app
$ mix phoenix.server
This should start the phoenix server on port 4000.
Next we'll startup the Ember server, on port 4200, using Ember CLI.
$ cd ember-app
$ ember s -pxy http://localhost:4000/api
This will proxy all requests to the server to localhost at 4000 (pxy is an alias for --proxy).
Fire up a browser and navigate to port 4200. You should see this screen.
More Reading Material
If you're looking for more Phoenix tutorials check out these sites. They were helpful in making this guide.
- Mike North's Building a performant real-time web app with Ember Fastboot and Phoenix (Part 1)
- Building a Phoenix Api
- Create a Mix Task for an Elixir Project
- Debugging Phoenix with IEx.pry
Also check out Chris McCord's book Programming Phoenix: Productive |> Reliable |> Fast !
It's been really helpful in my learning.
Conclusion
In this tutorial we created a Phoenix back-end with a teacher end point that sent over JSON API. We then created an Ember UI front-end that retrieved that JSON API data and displayed it to the user.
If your interested in Phoenix or Ember sign up below to get a free Ember cheat sheet! Thanks for reading!
Image Credit Phoenix Framework