One thing as developers that we all should probably do more often is unit testing. Software development processes like Test Driven Development put an emphasis on writing tests even before the code is written. Any Ember application that is in production should keep this in mind.
QUnit

We are going to explore how to write some simple tests with ember-cli. Ember uses QUnit as its default unit testing helper suite. It's used by Ember and jQuery, and many others. That's not to say you can't use other unit testing frameworks. Ember Mocha is another great solution. For the purpose of this post we'll stick with Ember QUnit since it's built in.
We can run tests a couple of ways. Either by navigating in the browser to http://localhost:4200/tests or by installing PhantomJS via npm and running the tests on the command line via 'ember test'. PhantomJS is a headless scriptable webkit JavaScript API. It's used for a number of things including running functional tests without a web browser. For now we'll stick with the web browser.
Unit Testing
Unit tests are used to test the smallest unit of functionality. For example it could be used to test one small feature. If we look in the test folder inside an ember-cli application we'll see a helpers and unit folder. Inside the unit folder will be some default unit tests. We can edit these files and update them for our own tests.
Before we continue any further lets use an older project of mine as reference going forward. We'll be looking at the Ember-CLI blog tutorial I created a few posts ago.
In that project let's check our posts.edit controller. We want to make sure that when someone clicks the 'edit' button that the 'isEditing' property is set to true. The existing posts controller looks like this.
...
//controllers/posts/edit.js
actions: {
...
edit: function() {
	this.set('isEditing', true);
 }
});
Ember has already created a stub for the unit test. All it does is make sure the controller exists.
// tests/unit/controllers/posts/edit-test.js

import {
  moduleFor,
  test
} from 'ember-qunit';

moduleFor('controller:posts/edit', 'PostsEditController', {
  // Specify the other units that are required for this test.
  // needs: ['controller:foo']
});

// Replace this with your real tests.
test('it exists', function() {
  var controller = this.subject();
  ok(controller);
});
The moduleFor will load what you specify. You can also specify other unit tests that are needed. The 'ok(controller)' returns back if it exists.
Let's add in another test at the bottom to check to see if 'isEditing' is true after the action 'edit' is triggered.
...

//after modulefor in edit-test.js file
test('check if isEditing is updated', function() {

        var ctrl = this.subject();

        ctrl.send('edit');

        equal(ctrl.get('isEditing'), true);


});
All we are doing here is creating a variable, with this controller and sending the edit action. 'equal' will check if both sides are the same. If we run this using 'http://localhost:4200/tests' we can see that it passed.

Acceptance and Integration Testing
Integration tests are usually built upon several unit tests. You can use it to test high level functionality. In my experience I would suggest to sticking with more integration tests and acceptance tests instead of just unit tests. You can use these tests later to do full regression test which is very helpful as your application continues to change and evolve.
Ember-CLI has several built in generators for tests. Run 'ember help g' to see all of them. Let's go ahead and create an acceptance test.
$ ember g acceptance-test posts/new
This will create a new acceptance test at 'tests/acceptance/posts/new-test.js' as shown here.
// tests/acceptance/posts/new-test.js
import Ember from 'ember';
import startApp from '../helpers/start-app';

var application;

module('Acceptance: PostsNew', {
  setup: function() {
    application = startApp();
  },
  teardown: function() {
    Ember.run(application, 'destroy');
  }
});

test('visiting /posts/new', function() {
  visit('/posts/new');

  andThen(function() {
    equal(currentPath(), 'posts.new');
  });
});
Note that the 'startapp' helper directory is wrong. I had to change it to '../../helpers/start-app' for it to find it. We'll talk about test helpers later.
Also note that this test fails in my ember blog example. This is because I'm using authentication and that new route is protected. Let's change the current path so it matches the new redirected path that occurs if the user isn't logged in.
//tests/acceptance/posts/new-test.js
...
test('visiting /posts/new', function() {
//not authenticated should reroute to posts.index
  visit('/posts/new');

  andThen(function() {
    equal(currentPath(), 'posts.index');
  });
});
There we go and now the test passes. The current path will be redirected back to posts/index instead of posts/new. For now let's assume we don't have authentication and we wanted to check what happens if the user clicks 'add' for a new post but fills nothing out. It should stay on the same page.
//tests/acceptance/posts/new-test.js
...
test('Clicking add without filling fields', function() {
  visit('/posts/new');
  click('input[value="Add"]');
  andThen(function() {
    equal(currentRouteName(), 'posts.new');
  });
});
This should pass. Now let's create a test where the users fills out all the required fields, title and description, and clicks 'Add'.
...

test('clicking Add after filling out fields', function() {
  visit('/posts/new');
  andThen(function() {
    equal( currentRouteName(), 'posts.new', 'routed correctly');
  });
  fillIn('textarea[placeholder="Title"]', 'Test Title');
  fillIn('textarea[placeholder="Description"]', 'Test Description');
  click('input[value="Add"]');

  andThen(function() {
    equal(find("a:contains(Test Title)").length, 1, "post is displayed");
    );
  });
We use 'fillIn' to populate the textarea. Then we simply click and wait for a response. We check the anchor tag for the test title. If all checks out it will pass.
There is a lot more you can do with QUnit and ember-cli. We can create helper classes, a mock server and more. I'll leave that for another post. In addition Ember QUnit is continuosly being updated and there are some new deprecations with latest version that you should be aware of in 0.2.x. You can always check out the official ember-cli testing guide for more information as well.
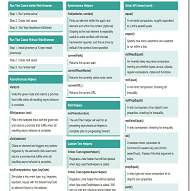
So what do you think? I thought it would be a good idea to create a quick cheat sheet to keep all the Ember QUnit commands listed in one place. I included some basic QUnit API calls as well. I'll be updating it as time goes on. Sign up for my email list below to receive it.