
Build A Login System With A Welcome Email Using A Post Confirmation Lambda Trigger With Amplify!
Hi, I'm Erik! This is my blog! I'm a developer advocate on the Amplify UI team and today I wanted to share with you a straight forward way to add authentication to your application, and then have it generate a welcome email after a user registers!
Before you get too far, please follow me on Twitter at @ErikCH! I frequently tweet about front-end development, and Amplify!
Full code is available on my Github for this tutorial! (Feel free to star it!) Feel free to follow along with this video as well!
Overview
In this tutorial I'll explain how you can use a Post Confirmation Lambda Trigger to generate an email using AWS SES, to welcome new users who sign up for your application.
We'll be using Amplify, which is a set of tools that allows for full-stack web and mobile developers to create and build apps.
Are you brand new to Amplify? Check out my last tutorial where I describe in depth how to add Authentication to your application. Let's jump in!
Setup
We are going to create a new application using create-vue. We'll then install the neccessary libraries and configure Amplify!
Create a new Vue app!
$ npm init vue@latestChange directories for the new app.
$ cd welcome-app-authInstall the Amplify libraries.
npm i @aws-amplify/ui-vue aws-amplifyIf you haven't already install the Amplify CLI.
$ npm install -g @aws-amplify/cli
If this is the first time running Amplify, run the configure command. This will prompt you to log into the AWS console and setup your AWS credentials. You can always register for an account and get 1 year for free.
$ amplify configureRun the amplify init command in the root of your new project. This will setup Amplify for your project and initialize the backend. You may notice a new amplify folder. This will hold all your Amplify configurations.
$ amplify initNote: It is recommended to run this command from the root of your app directory
? Enter a name for the project welcomeemailauth
The following configuration will be applied:
Project information
| Name: welcomeemailauth
| Environment: dev
| Default editor: Visual Studio Code
| App type: javascript
| Javascript framework: vue
| Source Directory Path: src
| Distribution Directory Path: dist
| Build Command: npm run-script build
| Start Command: npm run-script serveNext, we'll add auth! This will create a Cognito instance and User Pool. Cognito will provide us identity and access management for our application.
When prompted choose Manual configuration. This will ask a lot of questions, if you get lost or are unsure what to choose, follow the prompts I listed below.
Look out for the prompt that asks Do you want to configure Lambda Triggers for Cognito? Make sure you choose Y here and then choose Post Confirmation for the next prompt and than choose Create your own module.
Use Space bar to select items
$ amplify add auth
Using service: Cognito, provided by: awscloudformation

 The current configured provider is Amazon Cognito.

 Do you want to use the default authentication and security configuration? Manual configuration

 Select the authentication/authorization services that you want to use: User Sign-Up, Sign-In, connected with AWS IAM controls (Enables
per-user Storage features for images or other content, Analytics, and more)

 Provide a friendly name for your resource that will be used to label this category in the project: welcomeemailauth9e33a2f49e33a2f4
 Enter a name for your identity pool. welcomeemailauth9e33a2f4_identitypool_9e33a2f4

 Allow unauthenticated logins? (Provides scoped down permissions that you can control via AWS IAM) No

 Do you want to enable 3rd party authentication providers in your identity pool? No

 Provide a name for your user pool: welcomeemailauth9e33a2f4_userpool_9e33a2f4

 Warning: you will not be able to edit these selections.
 How do you want users to be able to sign in? Email

 Do you want to add User Pool Groups? No

 Do you want to add an admin queries API? No

 Multifactor authentication (MFA) user login options: OFF
 Email based user registration/forgot password: Enabled (Requires per-user email entry at registration)

 Specify an email verification subject: Your verification code

 Specify an email verification message: Your verification code is {####}

 Do you want to override the default password policy for this User Pool? No

 Warning: you will not be able to edit these selections.
 What attributes are required for signing up? Email

 Specify the app's refresh token expiration period (in days): 30

 Do you want to specify the user attributes this app can read and write? No

 Do you want to enable any of the following capabilities?
 Do you want to use an OAuth flow? No

? Do you want to configure Lambda Triggers for Cognito? Yes

? Which triggers do you want to enable for Cognito Post Confirmation

? What functionality do you want to use for Post Confirmation Create your own moduleThe last step will ask if you want to edit your Lambda function. We can do that now!
Lambda Setup With SES
The Lambda function we just created will be located in the amplify/backend/function/your-lambda-function-name/src/custom.js
Inside the Lambda function we'll write a function that connects to Amazon's SES !
You'll notice a few things with the code posted below. We must check if the event.triggerSource is from PostConfirmation_ConfirmSignUp . This will insure emails are only sent to users who sign up and confirmed their email.
In the code below you'll need to enter in a valid email address for the Source, this will act as the return address. I sent mine to mytestemail@example.com. This will need to be changed for your email address.
const AWS = require("aws-sdk");
AWS.config.region = process.env.AWS_REGION;

const ses = new AWS.SES({ apiVersion: "2010-12-01" });
/**
 * @type {import('@types/aws-lambda').APIGatewayProxyHandler}
 */
exports.handler = async (event, context) => {
  if (
    event.request.userAttributes.email &&
    event.triggerSource === "PostConfirmation_ConfirmSignUp"
  ) {
    return await sendEmail(
      event.request.userAttributes.email,
      "Congratulations " + event.userName + ", you have been confirmed: "
    );
  }
};

async function sendEmail(to, body) {
  var eParams = {
    Destination: {
      ToAddresses: [to],
    },
    Message: {
      Body: {
        Text: {
          Data: body,
        },
      },
      Subject: {
        Data: "Cognito Identity Provider registration completed",
      },
    },

    // Replace source_email with your SES validated email address
    Source: "mytestemail@example.com",
  };
  return await ses.sendEmail(eParams).promise();
}
Feel free to adjust the Subject and Body to your liking.
By convention, Lambda's don't have access to SES. But we can add in a rule to the custom-policies.json file in the amplify/backend/function/your-lambda-function-name
[
  {
    "Action": ["ses:SendEmail", "ses:SendRawEmail"],
    "Resource": ["*"]
  }
]
Looks good! Let's push it all up! You'll be prompted a few times to confirm the deployment. Make sure to choose Y
$ amplify pushSES Setup
We'll need to do some manual configuration of SES if this is the first time using it.
By default SES will be configured in Sandbox mode. In this mode every email address will need to be verified before SES will send to it. You can skip this process by clicking the Request production access button in the SES console.

I'll assume this is the first time setting this up, so we'll just use the Sandbox environment and add an email in that we have access too. To begin log into your AWS console and search for SES.
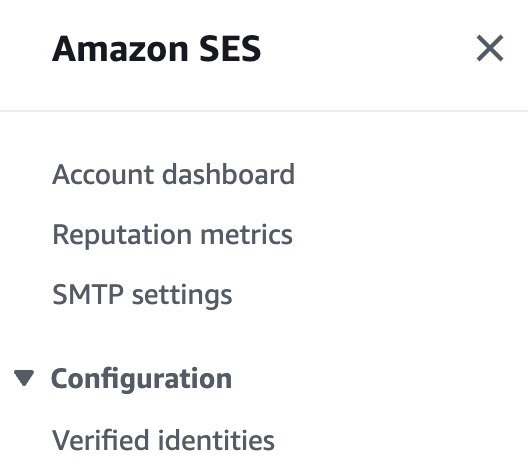
Open up the left hand side bar and go to Verified identities
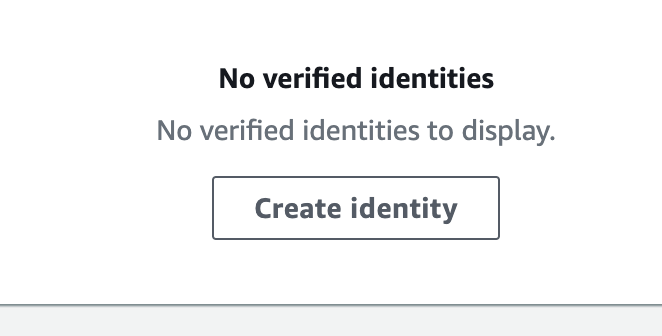
You should see a page with no verified identities. Click Create identity to begin.
Enter an email address that you can access. In this tutorial we'll use the fictitious mytestemail@example.com email. You might notice this is the same email address we added in our Lambda function. This is intentional, they should be the same for this tutorial.

After clicking Create Identity check your email inbox. The email maybe in spam, so check carefully. Click the link in the email to verify your account.
SES should now be able to send emails to that email address.
App Creation With Auth
The last, but certainly not least, part of this tutorial is to setup our Vue application with the Authenticator component. If you are using React no worries! Check out my guide on adding Auth to a React app! It's very similar, and will work the same way after you sign up.
We'll need to do a little more configuration to get Vite working with Amplify. Go into your index.html file and add this script tag right before the end of the body tag.
...
    <script>
      window.global = window;
      window.process = {
        env: { DEBUG: undefined },
      };
      var exports = {};
    </script>
  </body>
Inside the vite.config file add a new runtimeConfig option.
export default defineConfig({
  plugins: [vue()],
  resolve: {
    alias: {
      "@": fileURLToPath(new URL("./src", import.meta.url)),
      "./runtimeConfig": "./runtimeConfig.browser",
    },
  },
});
Having problems? Check out our troubleshooting guide!
In the main file you'll need to import in Amplify and configure it with the aws-exports file. The aws-exports file will be autogenerated for you after running the amplify push command from earlier.
import { createApp } from "vue";
import App from "./App.vue";

import { Amplify } from "aws-amplify";
import aws_exports from "./aws-exports";
Amplify.configure(aws_exports);

import "./assets/main.css";

createApp(App).mount("#app");
Go into the App.vue file and add in the Authenticator component. This will add in a sign in, create account component, already configured and ready to go.
Don't forget to add in the styles!
<script setup lang="ts">
import { Authenticator } from "@aws-amplify/ui-vue";
import "@aws-amplify/ui-vue/styles.css";
</script>

<template>
  <Authenticator>
    <template v-slot="{ user, signOut }">
      <h1>Hello {{ user.username }}!</h1>
      <button @click="signOut">Sign Out</button>
    </template>
  </Authenticator>
</template>
Testing It Out
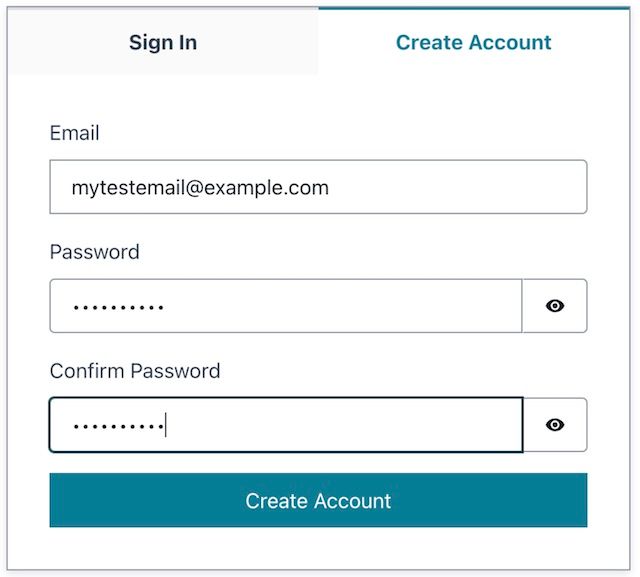
Start your app npm run dev and you'll see the Authenticator component. Click the Create Account tab and enter the same email that you setup earlier with SES. After clicking Create Account you'll be asked to verify your email. Enter the code in that you'll receive via email.
After verifying your email you'll be logged in. Go back to your email, and you'll see a congratulations email.
Congratulations! You did it! If you are reading this right now and you made it to this point, message me on twitter at @ErikCH My DMs are open! I'd love to hear how it went!
Conclusion
In this tutorial we created a Vue application, added a Lambda that was triggered when a new account was created and sent an email to it.
Thanks for reading!