

In my last Aurelia tutorial I went over the basics of Aurelia and created a custom element. Today we'll create a basic blog that can add posts.
Keep in mind that Aurelia is still in public preview and may not be ready for production. There has been a lot of progress since I last wrote about it. More developers have jumped on board, all the core modules have been updated, Enumerations have been added, naming consistency and more. You can check out some of the major advances here. There has been hints at more tutorials, and training courses coming up as well which is exciting.
If you like to follow along check out the source code here.
Setup
We'll begin by using the Aurelia skeleton. Download it from the link above and extract it. Then delete everything in the src folder.
As always we'll need to do our installs. To save our data we'll be using Firebase. If you don't know what Firebase is it's an API that you can use to store and sync files. It will act as our data store.
$ wget https://github.com/aurelia/skeleton-navigation/archive/0.13.0.tar.gz
$ tar xvfz 0.13.0.tar.gz
$ mv skeleton-navigation-0.13.0 AureliaBlog
$ cd AureliaBlog
$ npm install
$ jspm install -y
$ jspm install firebase
$ cd src  //remove all files here
Remember if you get any errors while using jspm you might need to register your github with it. Check out my last tutorial for information on that.
Route
We'll go ahead and create the app.js/app.html files first.
// src/app.js
import 'bootstrap';
import 'bootstrap/css/bootstrap.css!';

export class App {
  configureRouter(config, router){
    config.title = 'Blog';
    config.map([
      { route: ['','posts'],  moduleId: './posts',      nav: true, title:'Posts' },
      { route: 'newpost',        moduleId: './newpost',       nav: true, title:'New Post' },
    ]);

    this.router = router;
  }
}
This is a simple router. We have posts and new posts as our two routes. Nothing fancy here, this is almost exactly like the skeleton app.js file. We'll be using bootstrap for this project. The skeleton file includes a lot of libraries already preinstalled for you, so nothing else is needed to be installed with jspm. Check out the config.js file to see everything you already have at your disposal.
// src/app.html

<template>
  <require from='./nav-bar'></require>
  <nav-bar router.bind="router"></nav-bar>
  <router-view></router-view>
</template>
Remember all templates must start with template. The require is for a custom nav-bar element we'll be creating, router is bound to it. The router-view represents the location in the DOM where the current "page" will be rendered.
Nav-Bar Custom Element
We are going to borrow heavily from the skeleton file nav-bar for this example. First let's take a look at the nav-bar.js file
// src/nav-bar.js
import {bindable} from 'aurelia-framework';

export class NavBar {
  @bindable router = null;
}
This is simply telling Aurelia that properties in the class should appear as attributes on the element. You can read more about it here.
// src/nav-bar.js
<template>
  <nav class="navbar navbar-default navbar-fixed-top" role="navigation">
    <div class="navbar-header">
      <button type="button" class="navbar-toggle" data-toggle="collapse" data-target="#bs-example-navbar-collapse-1">
        <span class="sr-only">Toggle Navigation</span>
        <span class="icon-bar"></span>
        <span class="icon-bar"></span>
        <span class="icon-bar"></span>
      </button>
      <a class="navbar-brand" href="#">
        <i class="fa fa-home"></i>
        <span>${router.title}</span>
      </a>
    </div>

    <div class="collapse navbar-collapse" id="bs-example-navbar-collapse-1">
      <ul class="nav navbar-nav">
        <li repeat.for="row of router.navigation" class="${row.isActive ? 'active' : ''}">
          <a data-toggle="collapse" data-target="#bs-example-navbar-collapse-1.in" href.bind="row.href">${row.title}</a>
        </li>
      </ul>

      <ul class="nav navbar-nav navbar-right">
        <li class="loader" if.bind="router.isNavigating">
          <i class="fa fa-spinner fa-spin fa-2x"></i>
        </li>
      </ul>
    </div>
  </nav>
</template>
This is the exact same file as the skeleton. This is a bootstrap navigation bar. ${} represents the properties that are in our class, in this case the router object. This is also where we have the code for the spinner. There is more information about this file in the Aurelia getting started guide so I won't go much into it.
Posts
Here is the real meat of the program. For simplicity sake we want to be able to view a list of posts and add a post. We'll add functionality in the future to edit them.
// src/posts.html

<template>
<div class="row">
    <div class="col-md-4">
    <h1>Current Posts</h1>
        <br><div id='postsDiv'></div>
    </div>
</div>
</template>
This template simply shows all the posts. We'll populate the div tag in a moment.
// src/posts.js
import Firebase from 'github:firebase/firebase-bower@2.2.5';
import $ from 'jquery';

export class Posts{
  messageRef = new Firebase('https://aureliablog.firebaseio.com');
  heading = 'Posts';

  attached() {
    this.messageRef.on("value", function(snapshot) {
            console.log(snapshot.val());
            $('#postsDiv').empty();
            snapshot.forEach(function(childsnapshot){
            $('<div/>').text(childsnapshot.val().title + ": " + childsnapshot.val().description).prepend($('<em/>').text(childsnapshot.val().author+': ')).appendTo($('#postsDiv'));
            });
        });
    }

}
First we import Firebase from the jspm we installed earlier. We also need jQuery so we'll go ahead and import that as well. Attached is invoked when the view that contains the extension is attached to the DOM. It triggers when the page is completely loaded. If we needed to load something before the page was loaded we could have used activate.
The messageRef is a reference to the data store. I created one earlier for this tutorial. When the page is done loading we have an event listener on that gets updated whenever data changes in the data store. When it initially loads it returns back a snapshot object of all the data in the store.
We can use forEach to iterate through all the data. I used some sloppy jQuery to list out the author, title and description. It appendsTo the postsDiv on every iteration.
Add new Post
Last thing we need to do is make sure we can add posts.
// src/newpost.js
import Firebase from 'github:firebase/firebase-bower@2.2.5';
import {Router} from 'aurelia-router';
import {inject} from 'aurelia-framework';

@inject(Router)
export class Newpost{
  messageRef = new Firebase('https://aureliablog.firebaseio.com');
  heading = 'New Post';
  title = '';
  description = '';
  author = '';
  date = '';
  constructor(router) {
        this.router = router;
  }

  post(){
    this.messageRef.push({title: this.title, description: this.description, author: this.author, date: Date()});
    this.router.navigate('posts');

  }
}
Once again we create a reference to our data store. We have several properties that we'll use later. The post method uses push to add the new data to Firebase. Push accepts an object so this should work fine.
We also want to navigate back to the posts route after we are done adding the data. This is accomplished with the this.router.navigate('posts'); To be able to access the router we had to do an ES6 import of the router and inject it into the class. We then use the constructor to expose this.router to the the rest of the application. It's a little complicated but it's the only way you can create a transition in the class.
// src/newpost.html

<template>

<div class="col-md-4">
       Add Post
     <form role="form" submit.delegate="post()" class="au-target">
      <div class="form-group">
        <label for="fn">Title</label>
        <input type="text" value.bind="title" class="form-control au-target" id="title">
      </div>
      <div class="form-group">
        <label for="author">Author</label>
        <input type="text" value.bind="author" class="form-control au-target" id="author">
      </div>
      <div class="form-group">
        <label for="description">Description</label>
        <input type="text" value.bind="description" class="form-control au-target" id="description">
      </div>
      <button type="submit" class="btn btn-default">Submit</button>
    </form>

    </div>
</template>
Above is our template for the newpost. We have three different text fields each bound to a different property that we have in our class. The submit action triggers a delegate post() that we already defined earlier in our newpost.js file.
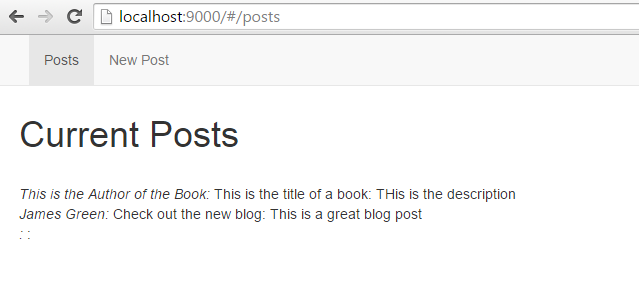
That should be it! If all goes well it should look something like this after we run gulp watch.
Future
In the future I'll be going over some more advanced features, including editing and authentication. This is just the start of what you can do. Thanks Zoltu in the Aurelia Gitter channel with his help on routing.
Have any questions? Feel to tweet me.
Image Credit aurelia